Wednesday, February 24, 2010

First classical update

The soundboard came out great. I cut it out and sanded it down to a little over 2.5mm and left it clamped in my solera face down. I also glued up my neck blank, because I had to rip it to reorient the grain.


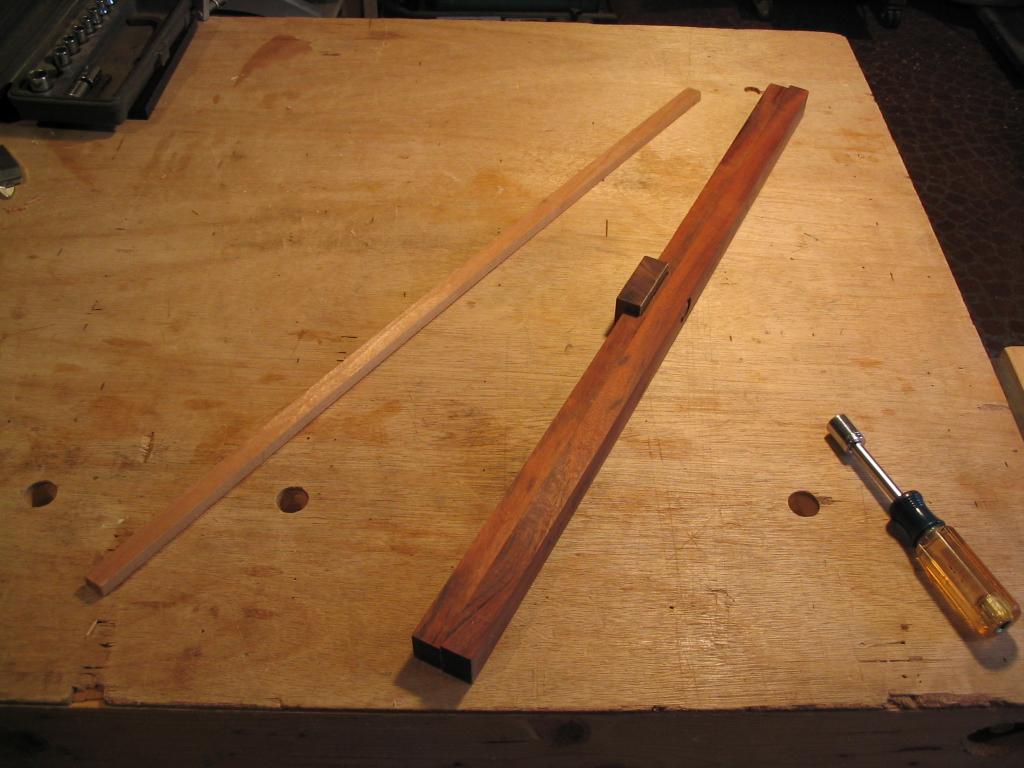
Here's the neck blank after I planed it. You almost can't even see the glue lines.


I ordered a couple of rosettes from DukeLuthier.com. The seem pretty high quality and the price was very reasonable.

Started building my first classical guitar

I put my dishing jig on hold and finally started building.

I glued up a soundboard for my first classical guitar from the surviving remnants of the first billet of Spruce I bought last year. It is not a clear piece and I am lucky that it was usable at all. Fortunately, the soundhole and rosette will cover the most offensive defects. This is a practice guitar.

I found some interesting information about using Chladni patterns for tuning guitar plates after reading an article by luthier Alan Carruth. Apparently, you try to distribute the resonant modes evenly across the spectrum by adjusting the soundboard and bracing. I don't fully understand the practice yet, but hope to gain more insight soon. I found these articles interesting:
http://www.speech.kth.se/music/acviguit4/part5.pdf
http://www.speech.kth.se/music/acviguit4/part6.pdf
http://www.phys.unsw.edu.au/~jw/guitar/guitarchladni_engl.html

Wednesday, February 17, 2010

Master luthier Mike Surrency

Yesterday, I got to spend a couple hours with master classical and flamenco luthier Mike Surrency at his home in Houston, Texas. His guitars are gorgeous, and he was kind enough to show me around his shop, explain some of his jigs and fixtures, and get me started in the right direction to building my own guitars.

He is the son of a professional cabinet maker and grew up with old-school woodworking. I was surprised to learn that he makes everything on the guitars (including purflings) except the tuning machines, and that he does it using a modest assortment of hand tools, small power tools and band saw. Kudos, Mike!

Tuesday, February 16, 2010

Deep-throat guitar-maker's clamps

I built some clamps as described in Irving Sloane's Classical Guitar Construction. I drew a full-sized template based on his diagrams and used some 1 x 2 maple scraps to make them. I got a 1" x 3/16" x 48" steel bar from the local hardware store and cut it into four 1-ft sections.

The upper and lower jaws start out the same, so I clamped them all together and ran them through the dado blade to cut the inside relief. This can also be done with a standard tablesaw blade--you just have to make more passes. I used a 1/4" mortising bit to make the mortises for the steel bar and used a 1/4" stopped-dado to cut the recess for the cam-lever. A disk sander quickly rounded the corners of the 1/4" x 1" x 4" cam-levers.

I used compression pins to hold everything together and put felt pads on the jaws. It took less than 2 hours to make four complete clamps.


Go-bar deck

Rather than paying $100 for a hardware kit from a large luthiery supplier, I purchased the parts from the local Home Depot for less than $25. All you need is:
  • (4) 2-ft sections of 3/4" metal conduit
  • (4) 30" sections of 1/2" all-thread
  • (16) 1/2" washers
  • (8) 1/2" lock washers
  • (8) 1/2" nuts
  • (2) 24" x 24" pieces of 3/4" plywood (1/4 sheet cut in two)
You will also need some fiberglass rods which cost me about $10 + shipping online:
  • (20) 24" x 1/4" fiberglass rods

Wednesday, February 10, 2010

Compound radius jig, revision 3

I modified the design to incorporate a torsion box using a lattice constructed with half-lap joinery. However, my good friend suggested adding a strip of 3/4" x 3/4" aluminum angle to reinforce the bottom of the original version. I will try this, as it might save me the trouble of constructing the torsion box.

Saturday, February 6, 2010

Compound-radius jig update

The prototype I built has racking problems while radiusing fingerboards. One of the support guides was flexing outward because I took a shortcut drilling the holes in the base. I braced the guide and lengthened the trunnions but it still racks. Since it is most likely tolerances, I will have to find a way to adjust the fit, perhaps with set screws and shims. Also, the long axis is flexing under the weight of the router. I reinforced it but it still flexes slightly.

I went back to the drawing board on the router guide. Since the previous version had flexing and racking problems, I decided to beef up the vertical supports and widen the anti-racking guides. I also added some plastic bushings as bearings on the guide surface. The bearing positions are adjustable along the axis to accommodate various radii. This new design should hold the router weight and move more smoothly to resist racking. Also, it can be used for both concave/convex runners.

I built this version and made the 40'-radius runners--they worked great. Unfortunately, the 2" platform is too thick--standard router bits won't extend down far enough, but the 1"-thick (MDF) platform was too flexible. I could try an extra-long endmill for $60, or a router-bit extension for $30, but I want this to be usable without any special tools or significant costs. Looks like I will have to make a 1" torsion box. Third time's a charm.

Guide to designing torsion boxes, AKA stressed-skin panels.

Monday, February 1, 2010

Luthier's multi-use (compound) radiusing/arching jig

Not completely satisfied with my hand-sculpted solera, I began devising a way to carve a perfectly radiused workboard dish using an inexpensive router jig. My first thought was a sort of router trammel with a semi-arch along the radius that lifts the router as it moves toward the outside; however, this design is limited to a uniformly radiused dish and leaves an area in the center that must be cleaned up.

I came across several jigs similar to this:


This jig is closer to what I was thinking but still limited to uniformly radiused dishes. However, I will incorporate this functionality into my jig design.

My initial design was something like this:
 
It also occurred to me that not only could this design be used to make uniform-radius dishes, but by replacing the separate concave runner on one side of the short axis, I could also create a compound radius. By replacing both concave runners on the long axis with flat ones and both concave runners on the short axis with convex ones, I get a fingerboard radiusing jig. Again, by changing the radius of one runner I can create a compound radius:

One caveat on fingerboard (concave) radiusing: The distance from the outside of the convex arch down to the fingerboard, including the length of the router bit, shortens the effective radius. When you are talking about a 12-inch radius, and inch or two is significant. This means you can also create a single arch radius to use for several radius profiles by adjusting the depth of the router bit. I picked up a 3 Piece Spiral Mortising Router Bit Set from Harbor Freight for $13. It includes a 3-1/4" long 1/2 shank which will give me extra length over standard router bits.

On the other hand, for dishing a radius on the order of 30+ feet, you are increasing the effective radius by the length of the router bit, and I don't think this will make a significant difference to the arch calculation.

If you are trying to do a compound radius fingerboard, then you might need to compensate for any change in height due to the changing radius to keep the fingerboard thickness uniform. This could be accomplished with a thin wedge across the runners.

Versatile arching jig

I designed a brace arching jig based on the one used prominently by Jon Sevy in his great tutorial, which he attributes to American Lutherie:


It's also based on The Long Compass. While the curve produced by this method is actually elliptical, at large radii it is a very close approximation. I combined these concepts into a shooting-board-like jig that can be used with a hand plane or modified to work on a table saw or band saw. I chose a hand plane because most bracing material is soft and a hand plane will cut through them like butter.

I drilled 7/64" holes along a line, spaced 1" apart, for use with 3/16" shelf pins. You space the pins for the length brace you need and deflect the brace by the amount for desired radius, then lock the toggle clamp. See the tables below for brace length and deflection distance.

Once clamped in, you plane the outside edge of the brace until it's flat, parallel to the jig. When you release the brace, it springs back into a graceful arch.

The exact dimensions of the block aren't critical, but I made my jig roughly 24" long and 8" wide using a piece of hardboard for the base and two scraps of plywood.

Length represents the length of the brace, or the chord across the arc, really. D is the distance by which you must deflect the brace (inward) in the center to achieve the desired radius.

40-ft radius:
 Length D (inches) D (16ths) D (32nds) D (64ths)
1 0.000 0 0 0
2 0.001 0 0 0
3 0.002 0 0 0
4 0.004 0 0 0
5 0.007 0 0 0
6 0.009 0 0 1
7 0.013 0 0 1
8 0.017 0 1 1
9 0.021 0 1 1
10 0.026 0 1 2
11 0.032 1 1 2
12 0.038 1 1 2
13 0.044 1 1 3
14 0.051 1 2 3
15 0.059 1 2 4
16 0.067 1 2 4
17 0.075 1 2 5
18 0.084 1 3 5
19 0.094 2 3 6
20 0.104 2 3 7
21 0.115 2 4 7
22 0.126 2 4 8
23 0.138 2 4 9
24 0.150 2 5 10
28-ft radius:
Length D (decimal) D (16ths) D (32nds) D (64ths)
1 0.000 0 0 0
2 0.001 0 0 0
3 0.003 0 0 0
4 0.006 0 0 0
5 0.009 0 0 1
6 0.013 0 0 1
7 0.018 0 1 1
8 0.024 0 1 2
9 0.030 0 1 2
10 0.037 1 1 2
11 0.045 1 1 3
12 0.054 1 2 3
13 0.063 1 2 4
14 0.073 1 2 5
15 0.084 1 3 5
16 0.095 2 3 6
17 0.108 2 3 7
18 0.121 2 4 8
19 0.134 2 4 9
20 0.149 2 5 10
21 0.164 3 5 11
22 0.180 3 6 12
23 0.197 3 6 13
24 0.214 3 7 14
25 0.233 4 7 15
26 0.252 4 8 16
27 0.271 4 9 17
28 0.292 5 9 19
29 0.313 5 10 20
30 0.335 5 11 21